I did it in under 4 hours – so you could make up your bag in the morning and carry it to your beach party or picnic that evening!
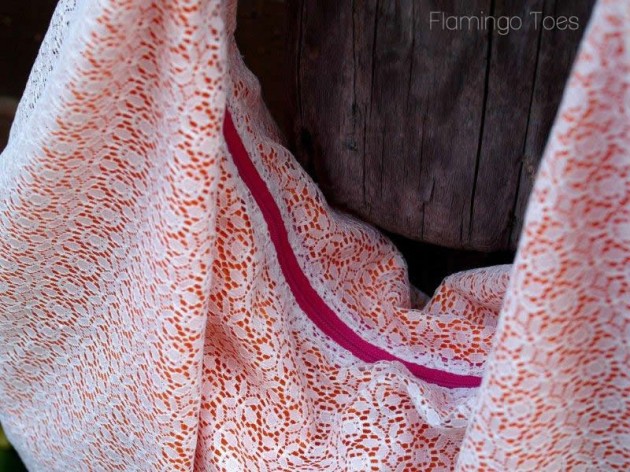
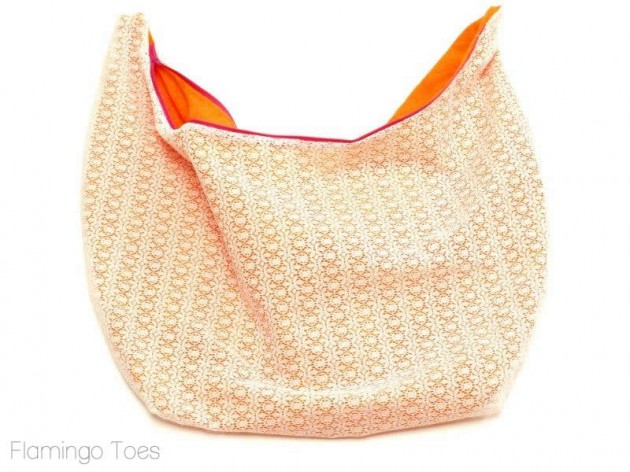
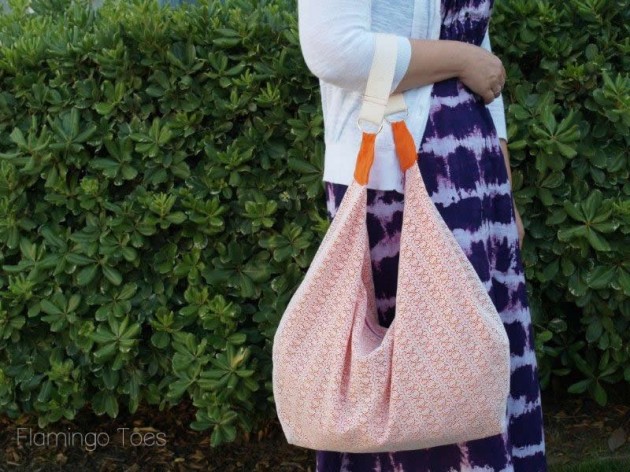
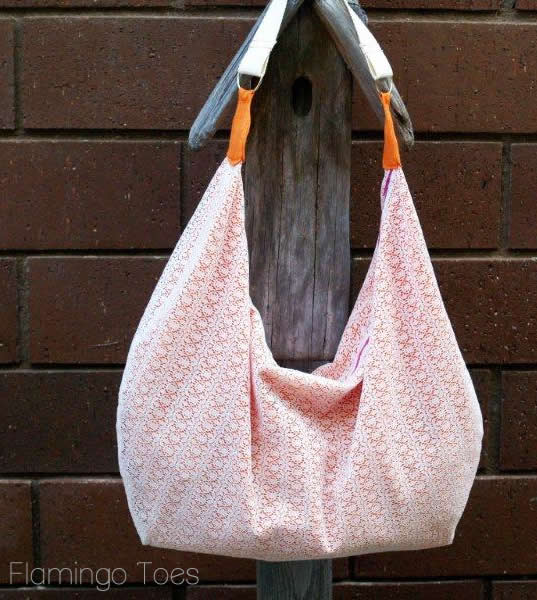
It’s a cute lace Hobo bag with a fun bright orange lining and tabs for the strap. I used a bright pink zipper for contrast – I think it’s so fun!
Ready to get started on your own?
Here’s what you’ll need:
- 2/3 yd lace
- 2/3 yd fabric for lining
- 22″ zipper
- 2 D Rings
- 18″ of webbing for strap
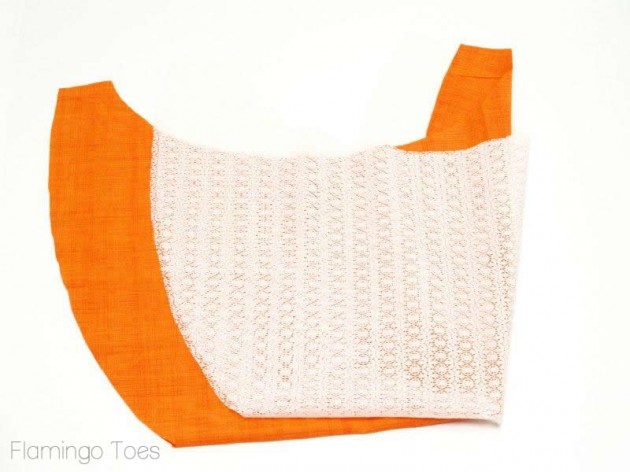
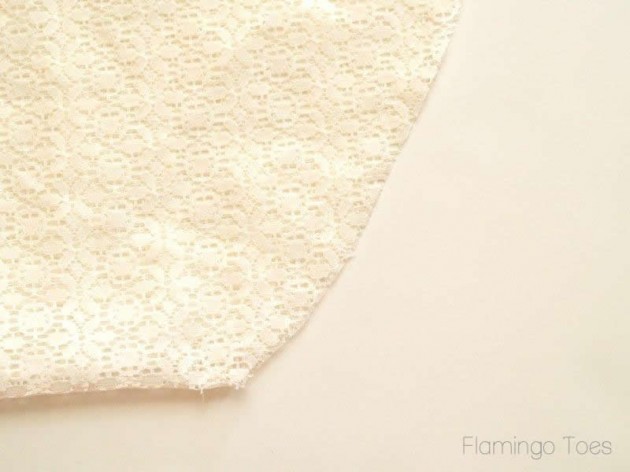
Start by drawing out your pattern. This doesn’t have to be exactly like mine, but you want to create a pattern for half of the bag. It should be about 13″ wide and curve in on the sides and the top.
Make the top about 3″ and leave about 7″ at the bottom as a straight line. This will be the fold at the bottom of your bag.
Get a helper to keep the pattern flat.
Fold your outside lace fabric in half with the selvedges together. Then fold the fabric in half again, vertically. Place the pattern piece so the straight side is on the vertical fold and the bottom is lined up with the horizontal folds. Cut one out of your lace and one out of your lining.
You should now have one outside piece and one inside piece.
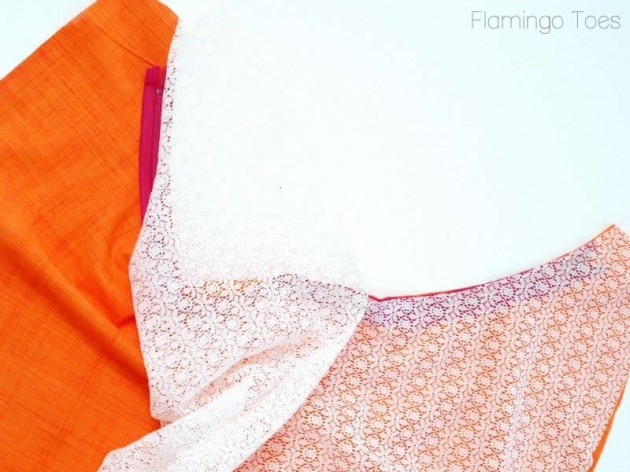
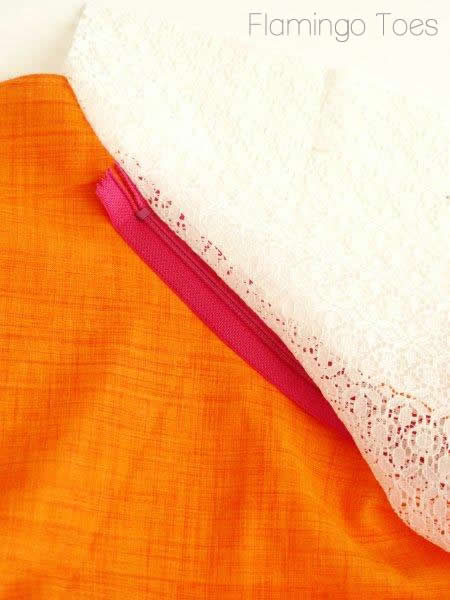
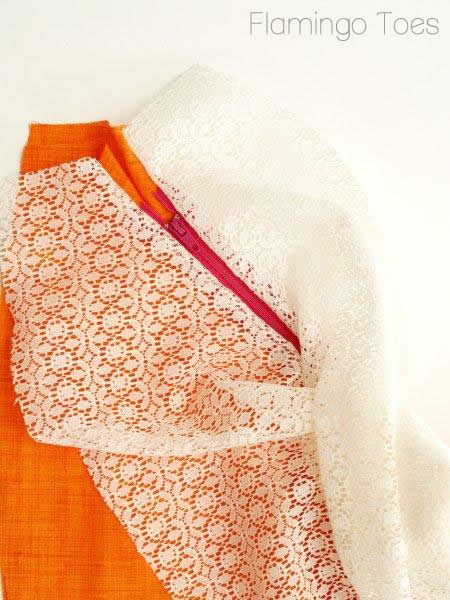
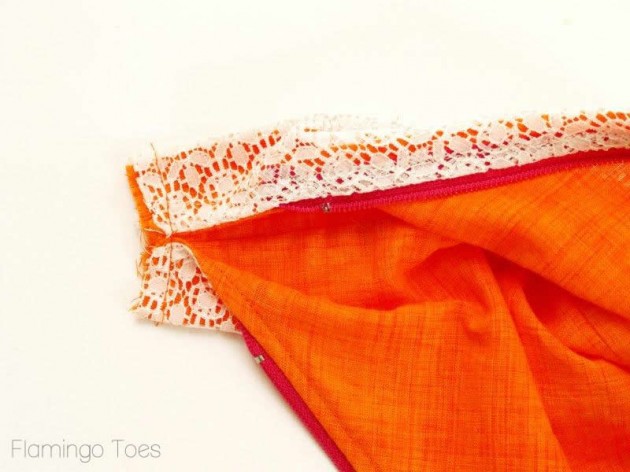
Center the zipper along the top curved edge, between the right side of the lace and the right side of the lining. The zipper should be completely inside, between the two pieces.
Sew the curved edges together, 1/4 from the edge, sewing the zipper in place as you go.
Here’s what the right sides will look like after you sew that seam.
Repeat this step for the other side of the zipper, and the other curved edges of the lace and lining.
Open up your zipper before this next step, it’ll be easier.
With your lining pieces out of the way, sew your lace pieces together along the two sides, right sides together.
Repeat for the lining.
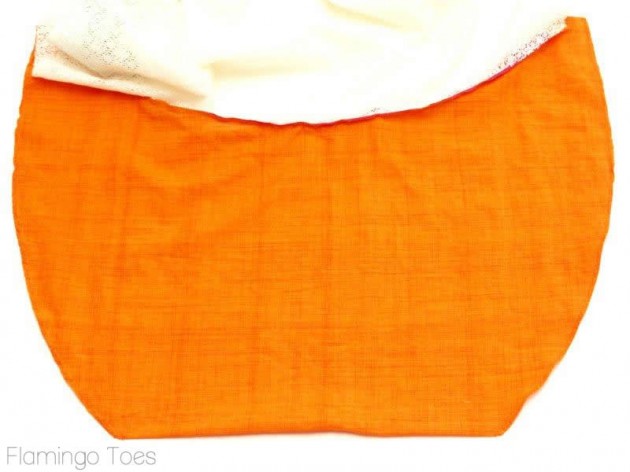
Turn your bag right side out, through the little sections at the top of the bag between the sides and the inner curves.
Press the lining inside.
Top stitch along your zipper. Fold the seams on the top corners to meet in the center. Sew across the top of each side.
Your zipper should be centered as well now.
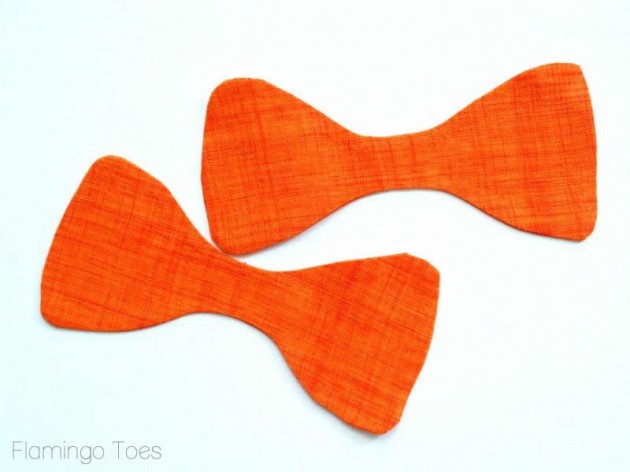
Cut out your two side strap connectors. These will look like a bow shape and you’ll need 4 of them.
You want the center part to be the width of your D ring (probably about 1″), and the outer width to be about 3 1/2″. The whole piece should be about 7″ long.
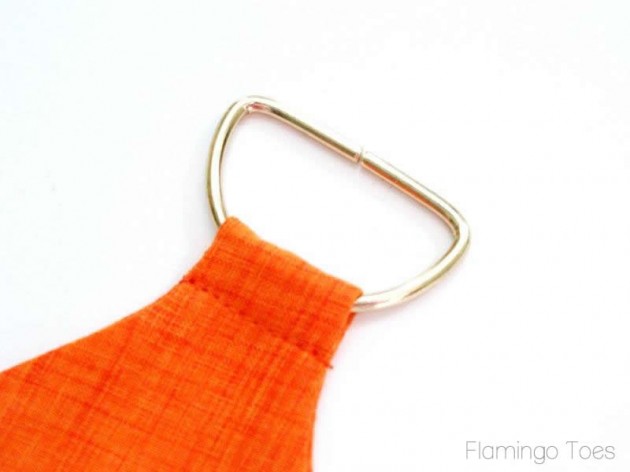
Sew two pieces together, leaving an opening for turning. Turn right side out and press. Repeat for the other two pieces.
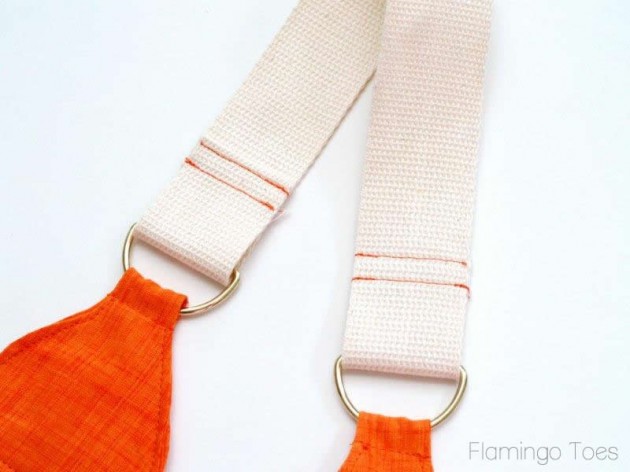
Feed half of the strap connector through a D ring and fold the piece in half. Sew just below the D Ring across the thin section of the connector.
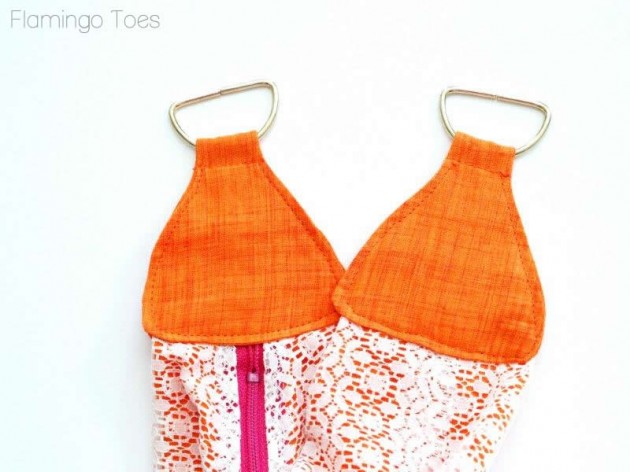
Place the top sides of your bag between the two connector halves. Make sure the bottom of the connector is just above the end of the zipper. Sew the connectors to the top of the bag on each side just inside the edge of the fold, all the way around.
Fold your strap webbing around the D rings on each side. Turn the edge under on the back side of the strap on each end.
Sew the strap together right at the fold, then again 1/2″ away to give it a little extra strength.
And that’s it!! How quick and fun was that?!
It’s a lightweight bag, so if you want to carry around books or something crazy, you might want to go with a heavier weight fabric, like a twill.
I hope you like it!
source